

Drones for Construction
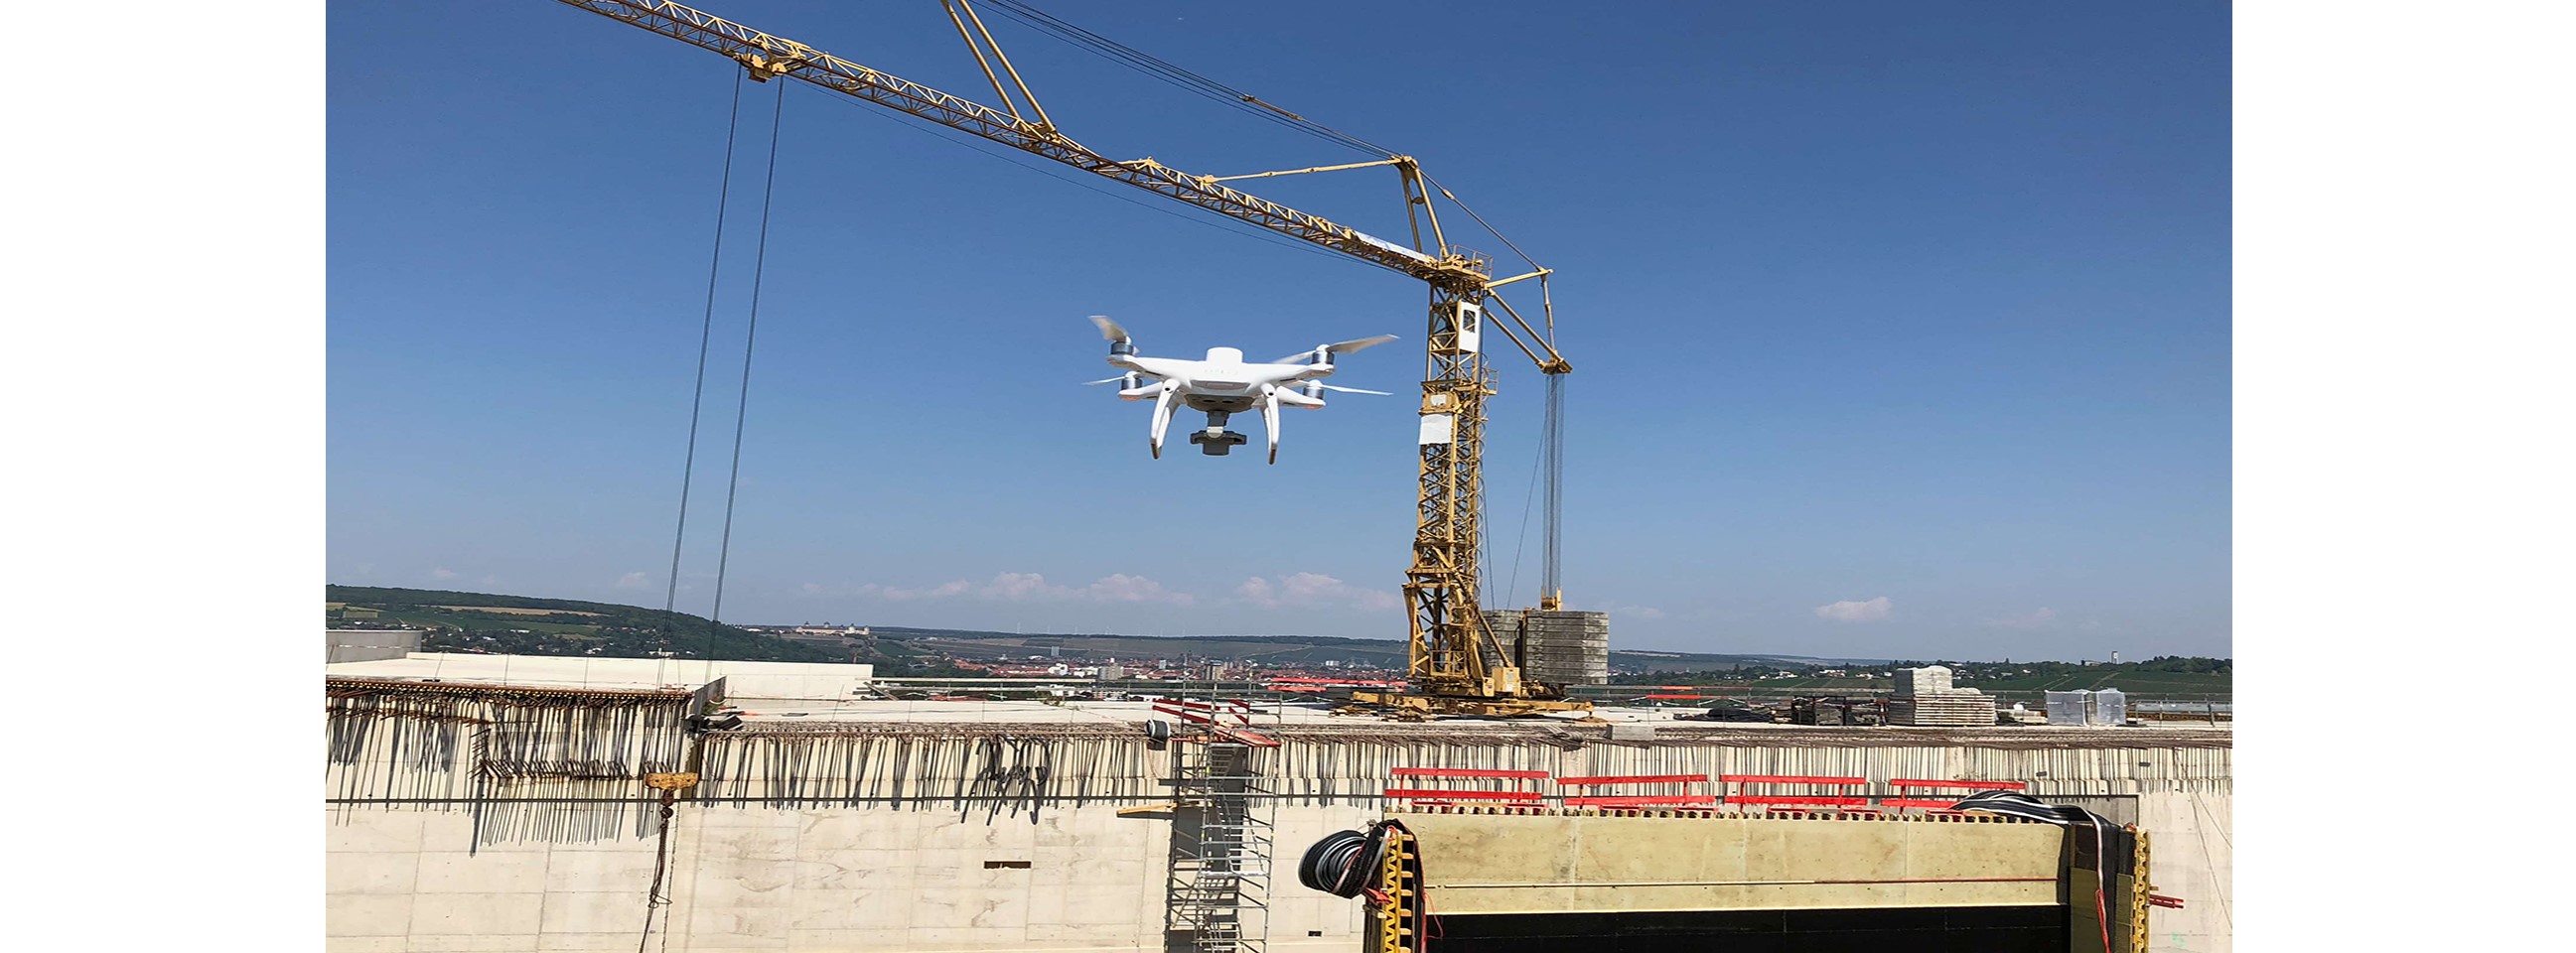
Advances in technology have made drones an affordable tool in the construction industry. In fact, construction has become the fastest-growing industry to adopt the use of drones. Drones have the ability to save thousands of euros during a project life cycle by collecting valuable data quickly, safely and accurately to benefit many areas of the construction project.
The Case Scenario
The case scenario replicates a topographic survey on undulating terrain, which is mostly open space, with some trees and derelict buildings. A DEM of the area is shown in Figure 1. There will be three different scales used in the time and cost calculations, 500x500m, 1000x1000m and 2000x2000m. This will show the relationship between the efficiency of the different methods with survey area.
The topographic survey will have a survey specification, as shown below, ensuring that each method achieves the minimum accuracy required.
- Survey specification:
- 1:200 scale output (topographic survey)
- Accuracy (95%): Hz +/- 10 cm, V +/- 10 cm (hard detail), 20 cm (soft detail)
- 10 cm minimum object size to be recorded
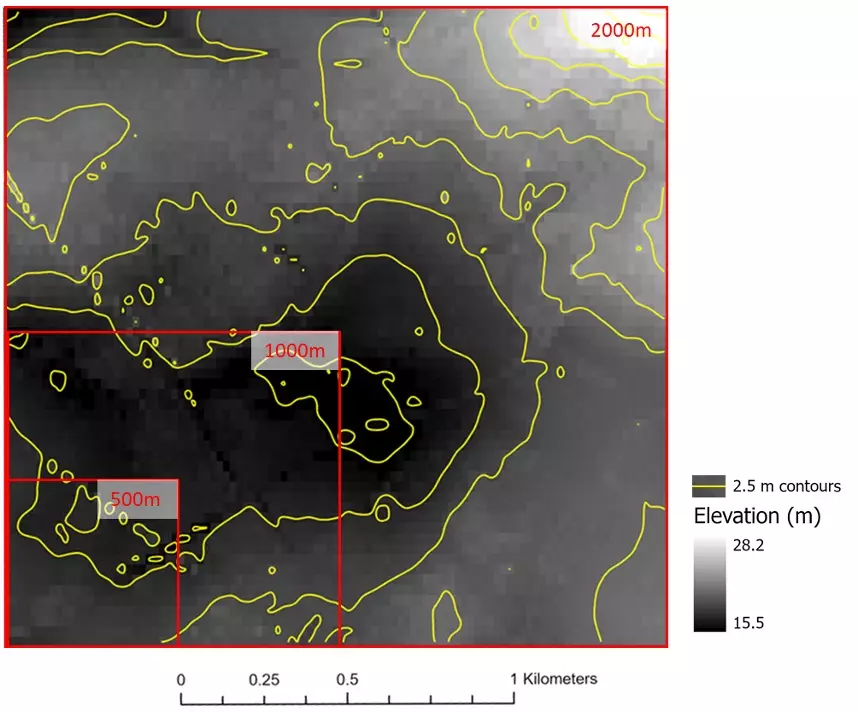
Das Fallszenario entspricht einer topografischen Vermessung eines hügeligen Geländes, das größtenteils aus Freiflächen mit einigen Bäumen und baufälligen Gebäuden besteht. Ein DEM des Gebiets ist in Abbildung 1 dargestellt. Für die Zeit- und Kostenberechnungen werden drei verschiedene Maßstäbe verwendet: 500x500m, 1000x1000m und 2000x2000m. Dadurch wird die Beziehung zwischen der Effizienz der verschiedenen Methoden und der Vermessungsfläche deutlich.
Für die topografische Vermessung gibt es eine Vermessungsspezifikation (siehe unten), die sicherstellt, dass jede Methode die erforderliche Mindestgenauigkeit erreicht.
Vermessungsspezifikation:
- Ausgabe im Maßstab 1:200 (topografische Vermessung)
- Genauigkeit (95%): Hz +/- 10 cm, V +/- 10 cm (harte Details), 20 cm (weiche Details)
- 10 cm Mindestgröße des zu erfassenden Objekts
Methods and Results
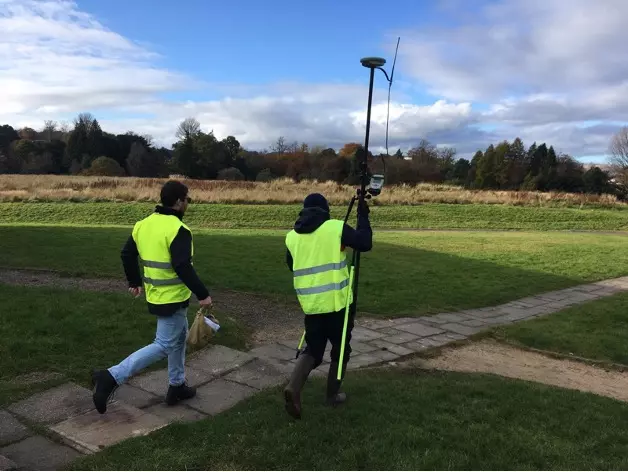
GNSS ROVER
The image to the left shows to people surveying using a GNSS rover.
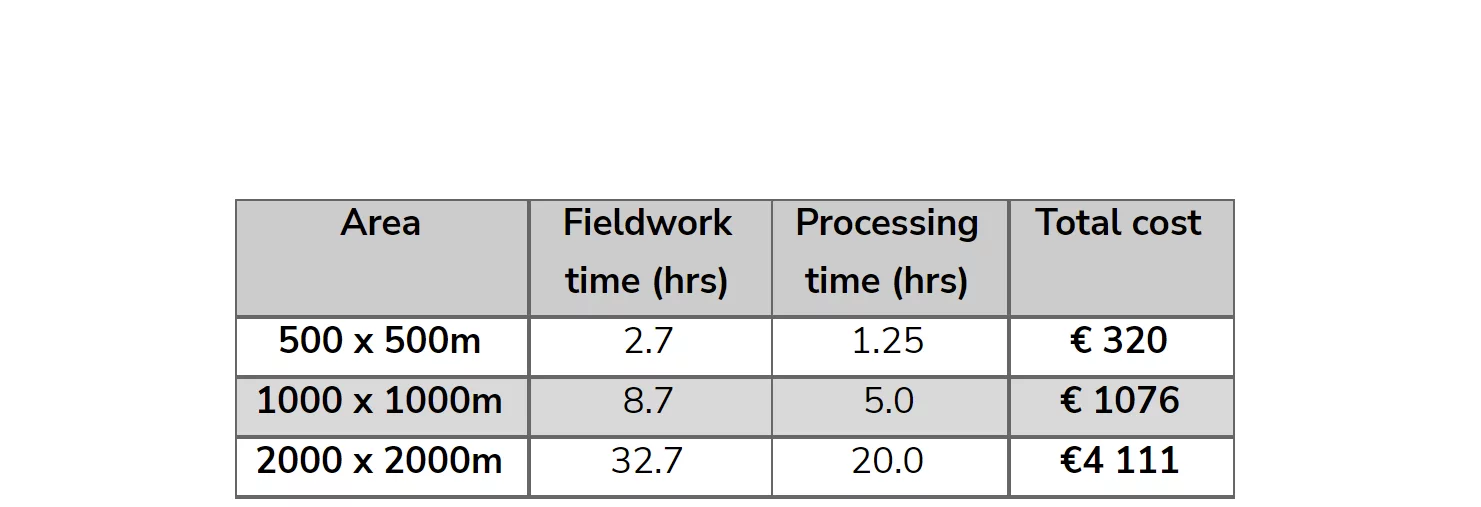
Cost and time calculations
Hardware:
- Leica Viva GS16 (two rovers and one Basisstation): Approx. 3* €12,500 = €37,500
Software:
- Data acquisition: Leica Captivate 1 234 € indefinitely
- Post-processing: AutoCAD 2,303 € per year
Acquisition costs: 42,648 €
Recurring costs per year: 2 303 €
Total equipment costs per year: € 10,833
Advantages
- High accuracy (for each point itself)
- BRider available
- No UAV training or experience required
- Can be carried out in all weather conditions
- Low computing power required
Disadvantages
- Far fewer data points in contrast to UAV solutions, therefore a less accurate representation of the topography
- Error-prone approach due to estimations and empirical values
- Less transparent compared to aerial surveys
- Field survey takes many times longer compared to UAV solutions
- BLimited reception strength of GNSS receivers in forests or urban canyons
UAV-Photogrammetrie
UAV Photogrammetry
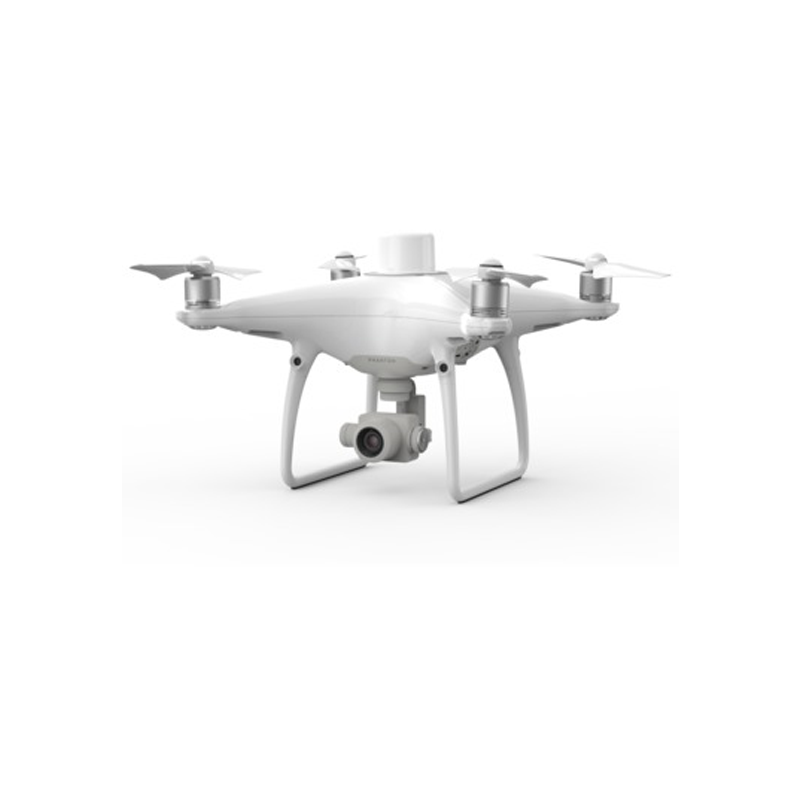
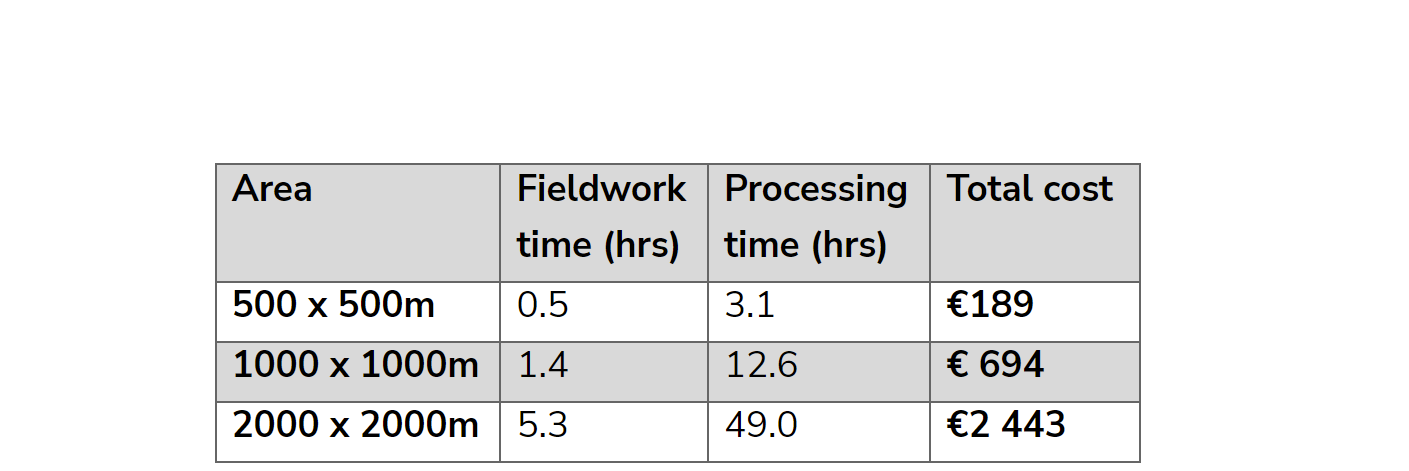
A drone based solution, overlapping images captured from different perspectives are processed to create a point cloud. This can be achieved by attaching a camera to a drone, that can take images at pre-defined intervals, and orientating these with GNSS and IMU data from the drone. The drone flies a pre-made flight plan ensuring the target area is mapped. There are different quality outputs depending on the flight parameters and camera specs. In this scenario we will take a Phantom 4 RTK, with a nadir flight plan at 100 m above ground level (AGL), 7.9 m/s, and with 60% side overlap.
The P4RTK can capture high detail and at high accuracy thanks to its RTK module, achieving horizontal and vertical absolute accuracy of approximately 2 cm, and a ground sampling distance (GSD) of 2.74 cm. Around 1.2 billion points per km2 (1200 per m2) could be expected based on default processing parameters. The photos would be processed in DJI Terra, generating a point cloud that can be imported into AutoCAD to generate drawings.
To see how the processing is achieved in DJI Terra, you can watch the tutorial from Epotronic at the following link:
DJI Terra photogrammetry tutorial: https://www.youtube.com/watch?v=MmeWdDh7Rxw
The image to the left is an example of a firefighter using a drone for a road collision reconstruction.
Cost and time calculations
Hardware:
- DJI Phantom 4 RTK €5 900
- Battery €189
Software:
- Datenerfassung: DJI GS RTK (free)
- Prozessierung: DJI Terra €4399 perpetual
- Post-processing: AutoCAD €2303 per year
Acquisition costs: 12 442 - 13 009 € (for larger survey areas more Batteries are needed)
Recurring costs per year: €2 552
Total cost of equipment per year: €5 000
Pros
- Highly efficient data capture.
- Captures top-view data, e.g. rooftops
- Fairly simple data processing
- Highly accurate
- Captures real-colour data
Cons
- Data intensive, our smallest survey site case scenario would require approximately 6.8GB of data.
- Accuracy dependent on light conditions and terrain.
- Dynamic risk assessment and relevant airspace permissions required.
- Long processing time.
- Shaded and below canopy areas are not well reconstructed.
UAV LiDAR
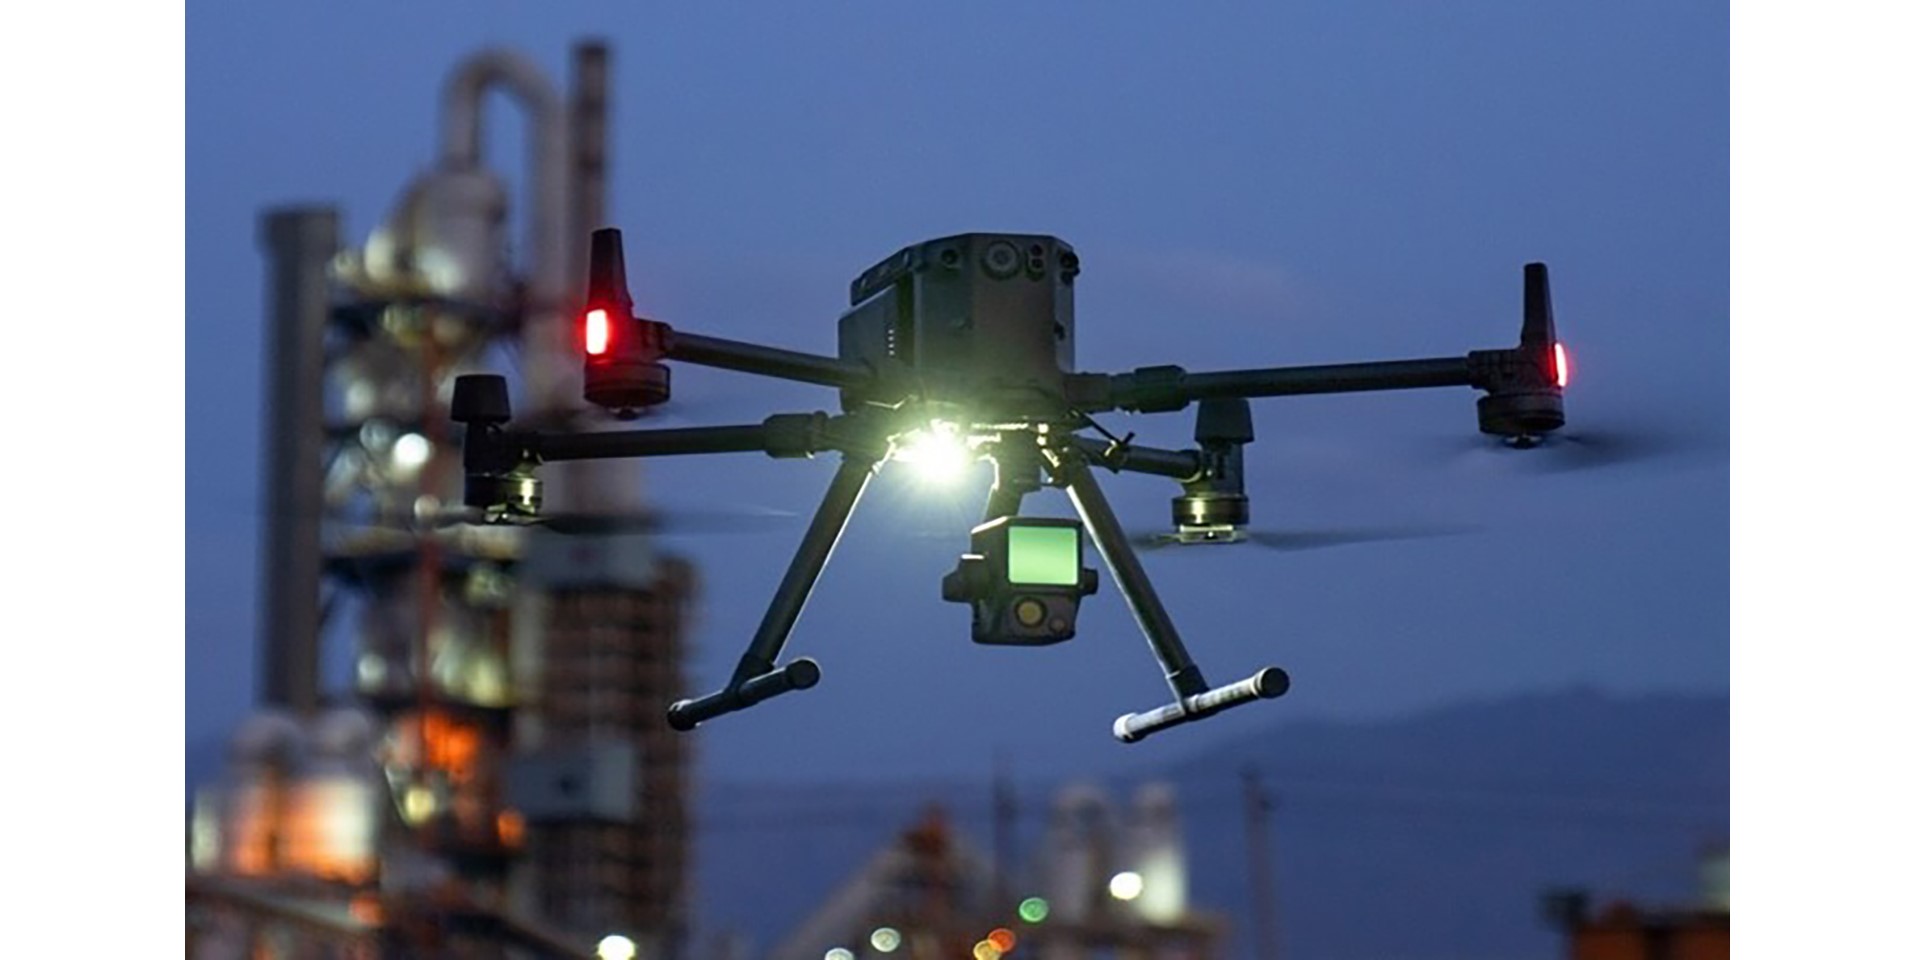
The alternative drone-based solution, which utilises a lightweight lidar scanner. Like with photogrammetry, the drone can be flown with an automatic flight plan. However, in contrast, a point cloud is instantly generated, which only needs to be georeferenced in post-processing by combining it with the GNSS and IMU data acquired from the drone.
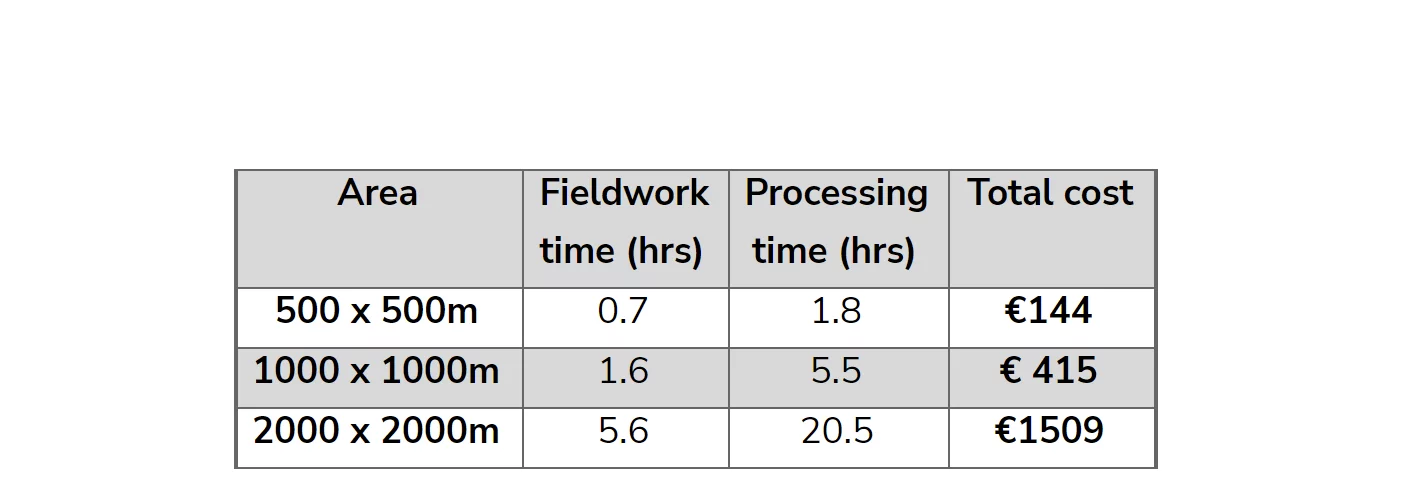
In this scenario, we will take a DJI Zenmuse L1 attached to an DJI M300 RTK, flown at 100 m AGL, 5 m/s and with 50% side overlap. The Zenmuse L1 is DJI’s first lidar sensor, which is officially capable of achieving a horizontal and vertical absolute accuracy of 10 cm and 5 cm, respectively. However, in tests conducted by Epotronic we measured vertical absolute accuracy as 2.1 cm from a 50 m AGL flight, and 5.1 cm from a 100 m AGL flight, along with vertical precision of +/- 3 to 5 cm, and +/- 7 to 11 cm, respectively. This lidar solution holds some advantages over photogrammetry, such as being able to work in low- or no-light, lower processing requirements and data storage, and the ability to capture detail behind some objects, e.g. glass or trees. A point density of around 250 million per km2 could be expected (250 per m2). Processing is also achieved with DJI Terra, which can be achieved in a matter of minutes.
To see how the processing is achieved in DJI Terra, you can watch the tutorial from Epotronic at the following link:
DJI Terra LiDAR tutorial: https://www.youtube.com/watch?v=sIegJ0BdwWs
Cost and time calculations
Hardware:
- DJI Zenmuse L1: €12 318
- DJI Matrice M300 bundle: €12 699
Software:
- Datenerfassung: DJI Pilot (free)
- Prozessierung: DJI Terra: €4399 perpetual
- AutoCAD: €2303 per year
Acquisition cost: €30 059 - €35 039
Recurring costs per year: €2303
Total equipment costs per year: €9649
Pros
- Highly efficient data capture
- Less data intensive
- Small processing time
- Can be flown in most weathers/ times of day.
- Captures top-view data, e.g. rooftops
Cons
- Expensive start-up costs.
- Only selected UAVs can operate with the scanners.
- Dynamic risk assessment and relevant airspace permissions required.
Conclusion
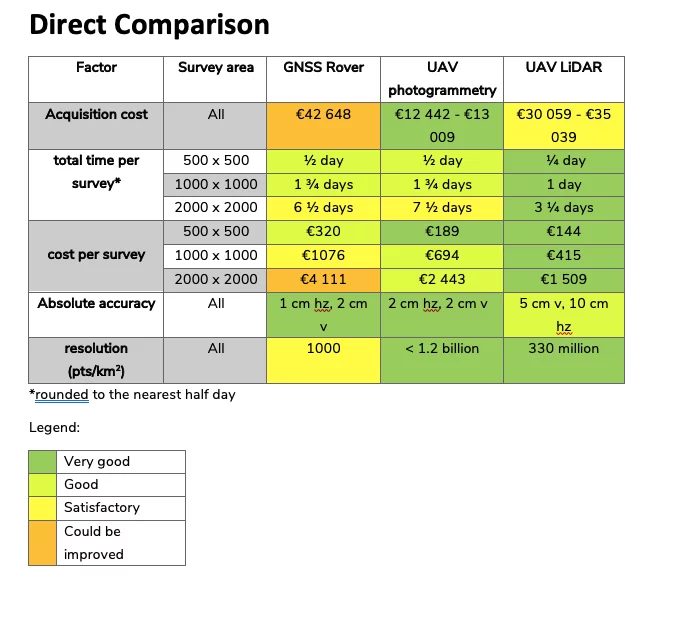
The calculations shown here provide a lot of useful information regarding which option is best for a survey of our case scenario survey site, and indicates for which applications the different methods would be most appropriate. Despite the high start-up cost, using the Zenmuse L1 proves to be the cheapest per survey, especially for larger surveys, due to it’s quick processing time.
Both drone techniques offer serious advantages compared to GNSS rover in terms of efficiency. Despite the total survey time being longer for photogrammetry, this time is mostly consumed by automated processing, allowing the surveyor to be free to undertake other projects, which is reflected in the cost per survey advantage. However, for smaller surveys, e.g. where only a few points need to be recorded, the high efficiency of the drone-based methods do not provide an advantage, and the whole process would probably be less efficient.
With regard to accuracy, the GNSS Rover stays on top. However, considering the low resolution, the accuracy of the output product is not expected to be this high in all areas, only for the points that have been measured. Additionally, despite the high efficiency of the L1 in this case scenario, it generally has lower accuracy relative to the P4RTK and GNSS Rover, although it is still able to surpass the survey specifications. Additionally, the L1 is able to survey in fine detail, which is ideal for complex objects, which photogrammetry tends to smooth down, and it’s ability to capture terrain beneath vegetation, which photogrammetry cannot. Additionally GNSS Rover can only measure points that can be physically reached, i.e. not tops of trees or inaccessible rooftops.
For this case scenario, the P4RTK would arguably be the best option, as it is efficient, the survey site is quite open meaning vegetation penetration is not important, and the start-up costs are relatively cheap. Of course this conclusion is dependent on the frequency of surveying; if frequent surveys are undertaken, then the L1 would hold the advantage, as the processing time from photogrammetry would delay results.
In general, GNSS rover is only advantageous for small scale surveys, and photogrammetry is advantageous for surveys that are open (without or with little vegetation) and that are not undertaken very frequently. LiDAR would be advantageous for surveys that have dense vegetation, where modelling of fine detail objects is required, e.g. powerlines or complex objects, and for surveys that are undertaken frequently, e.g. everyday for small or medium survey areas, or in low light conditions.
To browse the drone-based solutions described here and more, please visit our online store at epotronic.com, where you can also find lots of relevant information in our blog. If you would like to get in touch with any questions or queries, please don’t hesitate to get in touch at info@epotronic.com.